4.1 Install HACMP
Install the following file sets from the HACMP 4.4 installation media on each node:
4.2 Setup the AIX Environment for HACMP
1. Create the /dev/tty<#> devices on each node
2. Setup your SCSI adapters on each node
3. Create the /.rhosts file on each node
This file must contain entries for the service and boot adapters for each node in the cluster plus one entry for the loopback interface ( 127.0.0.1 ). If you have concerns about using the .rhosts file, refer to page 1-8 of the HACMP for AIX Administration Guide Version 4.4 .
An example /.rhosts for our example configuration would be:
4. Create the /etc/hosts file on each node
This file must contain all node IP interfaces. Since HACMP cannot rely on DNS or NIS to be available, HACMP operations rely on properly configured /etc/hosts files. For our example configuration, the file would contain:
5. Configure your boot adapters, standby adapters, and serial adapters
Note that you do not configure your service adapter. This is because HACMP will change your boot adapter into your service adapter when it brings up application. Therefore, without HACMP running, you configure the adapter with its boot name and address.
6. Add Physical Volume IDs (PV IDs) for all shared hdisks (if necessary)
If this is the first time that your shared disks have ever been used, you will need to manually assign PV IDs to them. To check for this, run lspv . The second column of the output should have a big 16-digit hexadecimal number, the PV ID, for each physical volume. If no PV ID is shown for certain volumes, you will have to create them yourself using the following command for each physical volume (the example assigned a PV ID to hdisk3 ):
% chdev -l `hdisk3′ -a pv=’yes’
7. Increase the maximum number of allowed logins
8. Turn off NetWare if it is installed
One potential problem is an incompatibility between NetWare and HACMP. NetWare will often keep a network interface busy which will cause attempted adapter swaps to fail. An easy test for this problem is to run the following command:
If the command came back with no output, you are fine. Otherwise, you will need to comment out the offending line in the /etc/inittab .
9. Create /etc/environment entry
Since DCE’s RPC mechanism will attempt to use any and all configured interfaces, it is important to put a RPC_UNSUPPORTED_NETADDRS entry in the /etc/environment file on both nodes with the IP address of every non-service interface listed. This will force the RPCs to utilize the service interface. For example, our sample configuration from the example worksheet would require the following entry:
RPC_UNSUPPORTED_NETADDRS=192.94.47.244:192.94.47.145:192.94.47.146:192.94.47.147
4.3 Initial HACMP Configuration
Using the information from your worksheets, perform the following steps from either nodes:

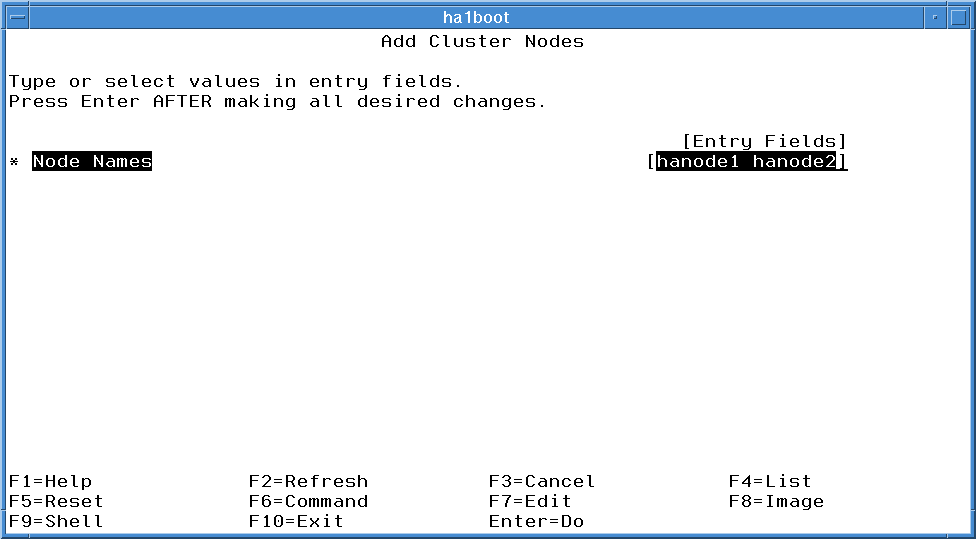
4.3.2 Define the two nodes in the cluster
Now tell the HACMP the names of the nodes in the cluster. These names do not have to be the same as the hostnames or adapters of the nodes since the names are used internally to HACMP.
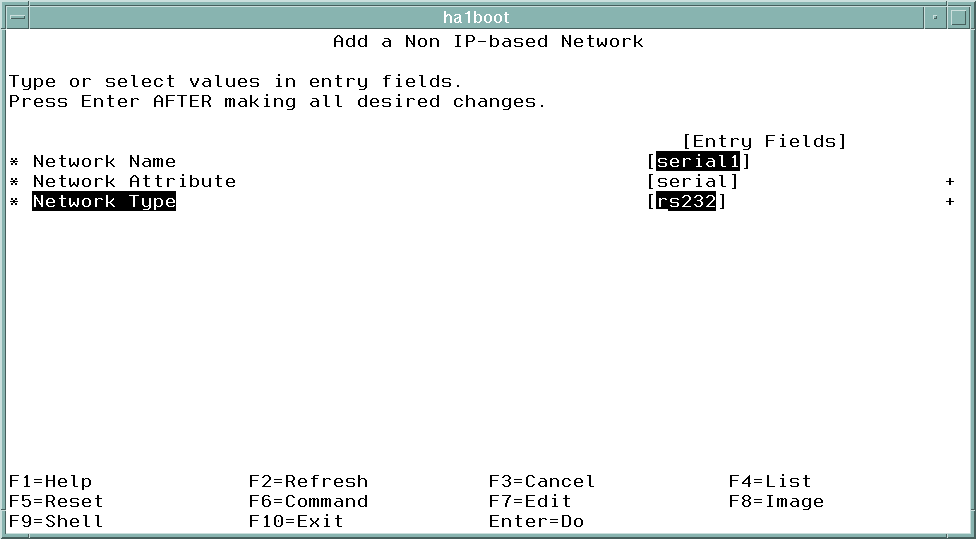
4.3.3 Define the networks
The SMIT path for configuring each network (ethernet and RS232) is the same
At this point, you will be offered two options, IP-based Network and Non IP-based Network .
Choose IP-based Network to configure your ethernet network. When this choice is entered, SMITTY will query your machine for IP-based networks and provide you with a list of networks. There will likely be only one choice, but make sure that the network you choose corresponds to the IP addresses for your service, boot, and standby adapters.
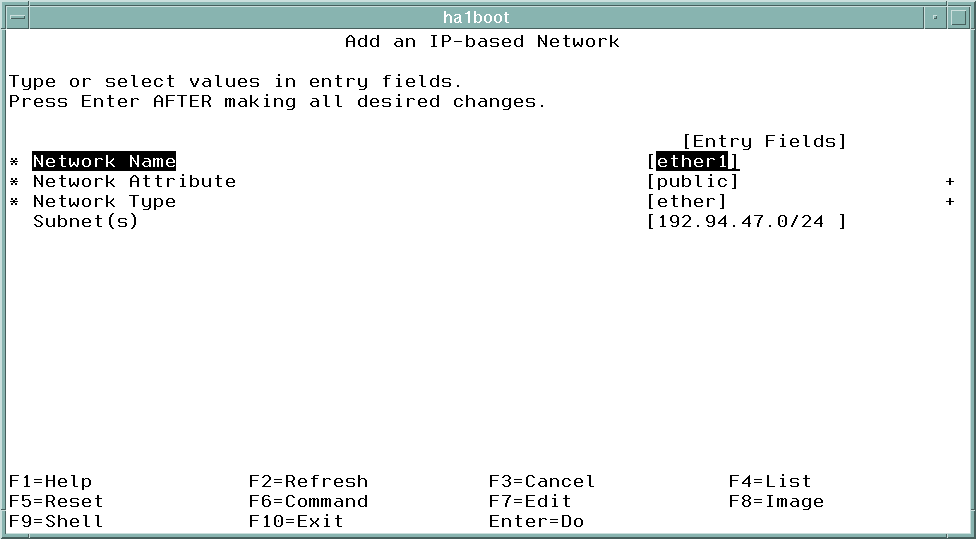
Figure G-4 Adding an IP-based Network
Choose Non IP-based Network to configure your RS232 network:
4.3.4 Define the network adapters
When defining network adapters, there are some slight differences between the values supplied for service, boot, standby, and serial adapters:
• Boot, standby, and serial adapters are tied to particular nodes, while service adapters are not.
• Service adapters have associated hardware (MAC) addresses so that clients don’t have to flush their ARP caches when it moves from one physical adapter to another.
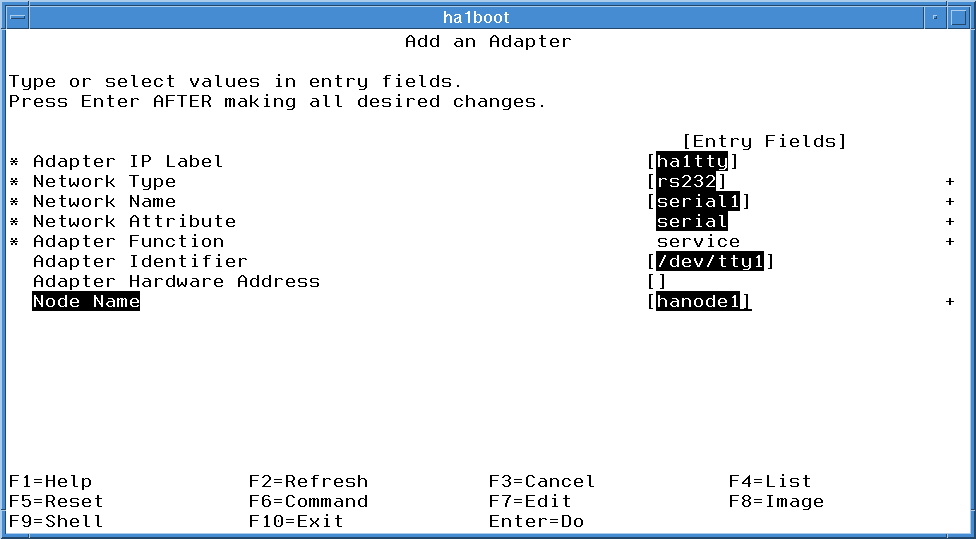
• Serial adapters have a field that says “service”, but we don’t call them service adapters.
The SMIT path for configuring each adapter is the same
 HACMP will complain if a boot or standby adapter is configured before their corresponding service adapter. However, HACMP will not allow a service adapter to be configured before its boot adapter is configured. So configure the boot adapters first and ignore the warnings.

Figure G-6 Adding an Ethernet Boot Adapter
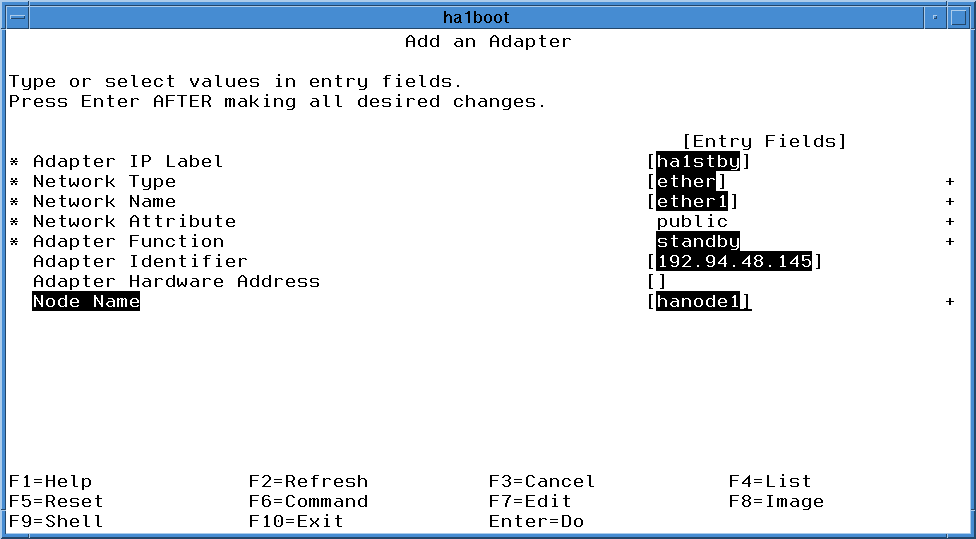
Figure G-7 Adding an Ethernet Standby Adapter
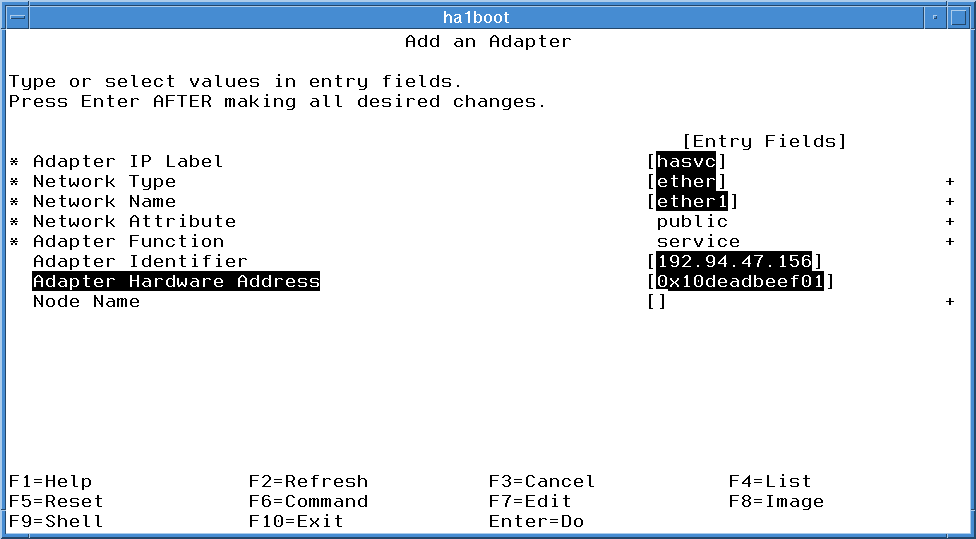
Figure G-8 Adding an Ethernet Service Adapter
4.3.5 Synchronize the Cluster Topology
By this point in the configuration, you should have given HACMP all the information it needs about the topology of your networks. However, only one of the nodes has this configuration information, and it needs to be on both nodes. So, it’s time to synchronize the cluster topology.
4.3.6 Define the resource groups
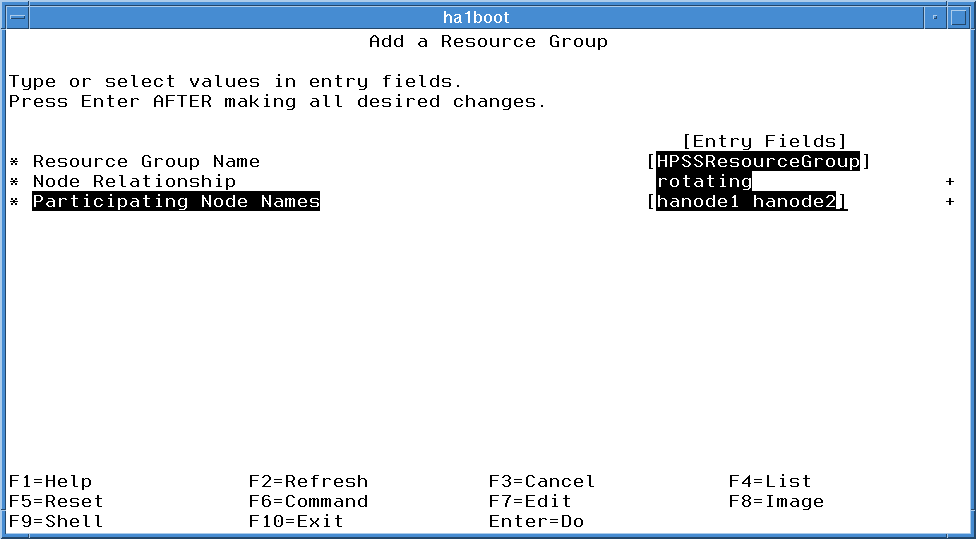
4.3.7 Assign Resources to the Resource Group
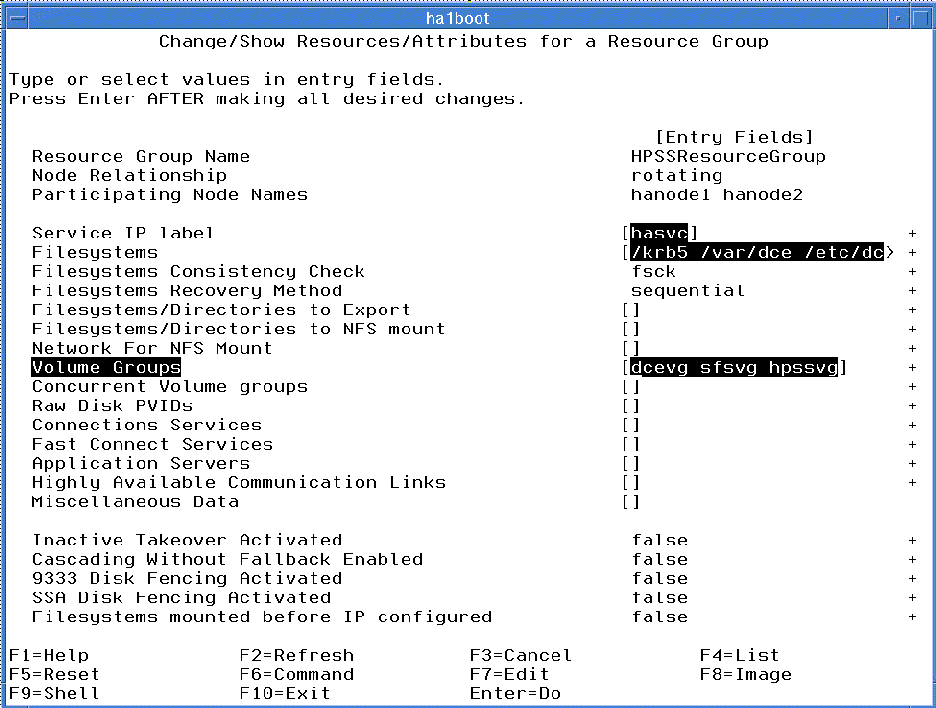
-> Change/Show Resources/Attributes for a Resource Group
There are only three fields that need to be filled in on the SMIT screen at this time: Service IP Label , Filesystems , and Volume Groups . Special care should be taken to ensure that all shared file systems and volume groups are listed (it’s usually easy if you use the F4 pick lists):
4.3.8 Synchronize Cluster Resources
By this point in the configuration, you should have given HACMP all the information it needs about your resource group. However, only one of the nodes has this configuration information, and it needs to be on both nodes. So, it’s time to synchronize the cluster resources.